We are now developing a website with drupal for a client. As the website is quite complex and we need handle many CSS files for modules and themes. Today I suddenly found that there are some CSS statements cannot work at IE. I have spent some time on that and finally we found IE cannot load some CSS files we add at the last in .info files. I guess IE has the limitation on the numbe rof CSS files load. But I don't believe in it because this is a tooooooooooo stupid reason....
After I had found same conclusion from others. I admit that I have put too many hopeness on IE.
In our case, we have 30 CSS files loaded in IE.
reference:
http://www.redfinsolutions.com/redfin-blog/ie-7-and-ie-8-impose-31-css-file-limit-drupal-beware
Wednesday, November 11, 2009
Friday, October 30, 2009
Explore Google Wave
I just got the sandbox account of Google Wave. What is its potential on web development? How can I add a wavelet into Drupal? I am studying on it :)

Friday, August 7, 2009
How to make Float center -- By yubis IT Solutions
When I was doing Drupal site for Yubis, I encounter this problem: Menu links or other HTML elements can be made float left / right, but is it possible to make it float center?
Unfortunately, there's no such thing in CSS! What we can do is to play with a little trick. The key is to identitfy this: Left 50% and Right 50%!
Consider a menu link as follows:
<ul>
<li>Main Page < / li>
<li>Second Page < /li>
< / u l>
First, we make ul {position: relative; right:50%}
What you'll see is the whole menu link shifts to the right!
Final stpe is to shift this whole thing 50% to the left. So, make things like:
li {position: relative; left:50%}
It's done. Check again your work and you'll see the whole menu now is placed at the center.
PS. Check another reference here: http://www.wowbox.com.tw/blog/article.asp?id=3008
Unfortunately, there's no such thing in CSS! What we can do is to play with a little trick. The key is to identitfy this: Left 50% and Right 50%!
Consider a menu link as follows:
<ul>
<li>Main Page < / li>
< / u l>
First, we make ul {position: relative; right:50%}
What you'll see is the whole menu link shifts to the right!
Final stpe is to shift this whole thing 50% to the left. So, make things like:
li {position: relative; left:50%}
It's done. Check again your work and you'll see the whole menu now is placed at the center.
PS. Check another reference here: http://www.wowbox.com.tw/blog/article.asp?id=3008
Monday, August 3, 2009
A nice talk on Drupal - Introduced by Yubis IT Solutions
Here I would like to introduce a nice talk held by Google Tech Talks on 8 OCT 2007, talking about "Implementing Drupal".
I found it' s really nice, detailed and I think you will be interested if you wanna have a more thorough understanding on Drupal.
Here is the link: Link
It's a about 52mins-long youtube video. You may also drag the time line to wherever you like according to following parts of the talk:
11:00 Killer Modules
1800 Drupal 6 intro
2030 Drupal 7 intro
2159 Links Resouces
2500 Drupal example - Edutopia.org
4600 Drupal vs Joomla
The part for "Drupal vs Joomla" is recommended, no matter you are a Drupal fans or Joomla fans, I've been waiting for such an objective view on these two great cms.
Enjoy!
Enjoy Drupal! :)
Thursday, July 23, 2009
Drupal template file -- Created by Yubis IT Solutions
Drupal is driven by templates file. Basically, files ended in *.tpl.php are the template files.
node.tpl.php controls how the content should be displayed. For example, you don't want to add the comment link for the nodes, you may set it here.
block.tpl.php controls how the blocks should be displayed. Div class may be added to the blocks, which helps to let its layout be modified by CSS.
- page.tpl.php
- node.tpl.php
- block.tpl.php
node.tpl.php controls how the content should be displayed. For example, you don't want to add the comment link for the nodes, you may set it here.
block.tpl.php controls how the blocks should be displayed. Div class may be added to the blocks, which helps to let its layout be modified by CSS.
Wednesday, July 22, 2009
Padding Error -- Created by Yubis IT Solutions

This is how the tablized images appear like splitting apart!!
In the old days, a whole image used to be tablized/split into tiny pieces of images. It's really had to work it like that. In Drupal, we found that the tablized images will have "padding error", in which sense the images will just appear to be splitting apart even though no CSS is inserted. This only happens with the browsers of the new standard, not those in the old days (e.g. IE6/7)
There's a little bit of history. In the old days though not too long ago, websites are not confined to W3C standard. But then, when this standard appeared, the browser vendors had a tough choice. Option 1 is to follow strictly the standard, but this makes the website look bad. Another option is to please the design while giving up the standard.
So, 2 main modes emerged: quirk and strict. Quirk mode (old versions of IE like IE6/IE7) supports those old design, while strict mode (newer versions of IE, Firefox) supports the W3C standard and follows strictly to it.
Tablized images are really old-fashioned, and so problems occur in strict mode. The simplest solution is to force the browser to run in quirk mode. To do this, add an img tag of style: block
Of course, the easiest way to get rid of it is avoid using tablized images.
Ref: http://www.quirksmode.org/css/quirksmode.html
Tuesday, July 7, 2009
Change text into images
To change the email address/any text from text into image. This can be done automatically in Drupal using module called Textimage. I tried installing it and the result looks good. (REF: http://drupal.org/project/textimage)
The image background and font size/family can be set through this module. Auto-insertion can be done when buddled with this module. (REF: http://drupal.org/project/textimage_autoinsert)
The image background and font size/family can be set through this module. Auto-insertion can be done when buddled with this module. (REF: http://drupal.org/project/textimage_autoinsert)
Friday, July 3, 2009
Tools may help on customizing theme
CopyRights Reserved by Yubis IT Solution
These are very useful tools for you to trace the html code to find out the classes of element, in order to customize your design.
For FF:
Firebug:
download link: https://addons.mozilla.org/zh-TW/firefox/addon/1843
For IE:
Internet Explorer Web Developer Tools
download link: http://www.microsoft.com/downloads/details.aspx?FamilyID=E59C3964-672D-4511-BB3E-2D5E1DB91038&displaylang=en

These are very useful tools for you to trace the html code to find out the classes of element, in order to customize your design.
For FF:
Firebug:
download link: https://addons.mozilla.org/zh-TW/firefox/addon/1843

For IE:
Internet Explorer Web Developer Tools
download link: http://www.microsoft.com/downloads/details.aspx?FamilyID=E59C3964-672D-4511-BB3E-2D5E1DB91038&displaylang=en

Wednesday, July 1, 2009
Embed Youtube/ other 3party video
Instal the Drupal module called embedded video from http://drupal.org/project/emfield
After that, add this field to any content type you wanna put into. (Addr: /admin/content/node-type)
Select Manage field and then add a field called embedded video.

After that, every node created using this content type contains an embedded video field. Simply copy the youtube link like http://www.youtube.com/watch?v=K7KhcEAmCxQ&feature=related and the video can be shown. It does save steps in copying object tags to display youtube videos.
You can check what type of video could be embedded in /admin/content/emfield. Configuration can be as well done there.
PS. Not only video can be embedded, even flickr or other kinda media can be embedded. This can be achieved by enabling Embed media module from /admin/build/modules.
Saturday, June 6, 2009
Install Slideshow Creator - Created by Yubis IT Solutions
Modules Needed:
1. Slideshow Creator -
dl link: http://drupalmodules.com/module/slideshow-creator
2. jQuery_plugin -
dl link: http://drupalmodules.com/module/jquery-plugins
Steps(Using drupal 6.x):
1. Site Configuration => Input format=> Configure => Tick SlideShow
2. Create a page => insert codes example in reference below to the "Body" section
Sample Code(for Testing):
To create a directory for images included in the slideshow:
(suppose the images placed in www\drupaltest\sites\default\files\frontpage_slideshow)
Other attributes can be shown in the README.TXT
Reference:
README.TXT in the module folder
Reference Link:
http://blog.csdn.net/bright60/archive/2009/01/04/3702890.aspx
1. Slideshow Creator -
dl link: http://drupalmodules.com/module/slideshow-creator
2. jQuery_plugin -
dl link: http://drupalmodules.com/module/jquery-plugins
Steps(Using drupal 6.x):
1. Site Configuration => Input format=> Configure => Tick SlideShow
2. Create a page => insert codes example in reference below to the "Body" section
Sample Code(for Testing):
[slideshow: 2, img=|http://drupal.org/themes/bluebeach/logos/drupal.org.png|drupal.org|Drupal|The ultimate CMS. Download it now!|Drupal|, img=|http://www.mysql.com/common/logos/mysql_100x52-64.gif|http://www.mysql.com|MySQL|Free and reliable SQL server and client.|_self|, dir=|files/|yes||Generic Photos|Arent they great?||]To create a directory for images included in the slideshow:
(suppose the images placed in www\drupaltest\sites\default\files\frontpage_slideshow)
[slideshow: 2, rotate=6, blend=3, dir=|/frontpage_slideshow/|yes||Generic Photos|Aren't they great?||]Other attributes can be shown in the README.TXT
Reference:
README.TXT in the module folder
Reference Link:
http://blog.csdn.net/bright60/archive/2009/01/04/3702890.aspx
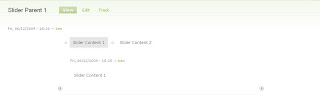
Install Slider - Text
Modules Needed:
Slider - dl link: http://drupalmodules.com/module/slider
Steps(Using Drupal 6.x):
1. Install modules
2. Add content type:
Administer => Content Management => Content Type => Add
Slider Parent Node (slider_parent_node) , Slider Content (slider_content)

3. Slider Parent Node Configure => Add field =>
slider_content(Type:node_reference, configure=>Tick Slider Content)
4. Site Configuration => Slider => Tick Slider_Parent_Node
5. Create content => Slider content => type sth like what you do in a pag
6. Create content => Slider Parent Node => like Step 5 but highlight the slider content node to be included in "input format" section
7. Finish
Other Example: http://www.yubis.net/
5. Create content => Slider content => type sth like what you do in a pag
6. Create content => Slider Parent Node => like Step 5 but highlight the slider content node to be included in "input format" section
7. Finish

Other Example: http://www.yubis.net/

Friday, June 5, 2009
Install getid3 module
Like FCKeditor, we need to download the actual engine together with the Drupal module to make it work.
After standard procedure to install a module, download the getid3 engine from http://prdownloads.sourceforge.net/getid3. Then, go to admin/site config/getID3. Confirm the path to include the getid3 engine. Then, decompress the getid3 engine just downloaded and put the getid3 folder to the path you entered.
After standard procedure to install a module, download the getid3 engine from http://prdownloads.sourceforge.net/getid3. Then, go to admin/site config/getID3. Confirm the path to include the getid3 engine. Then, decompress the getid3 engine just downloaded and put the getid3 folder to the path you entered.
Install FCK editor
FCKeditor is a great tool for you to make page layout. You don't want to make a page with many different fields like images/links/bullets/font style and so on. FCK editor helps to format your page. The text area input box will become the Word-like editor for easy formatting.

To install it, download Drupal module from Drupal website. Extract it to sites/all/modules as usual. However, the fckeditor contains another folder called fckeditor. What to put inside this secondary fckeditor?
Download the actual FCKeditor files to fckeditor/fckeditor. (http://www.fckeditor.net/download). It is suggested to remove the _sample/ directory when copying.
After that, install the module. You'll see admin/site config/FCKeditor when finish.
Thursday, June 4, 2009
The Making of gallery

Way to make a simple gallery. First, download the Image module from Durpal website. In admin/site config/, you'll find the one of "Images". Select "Image import".
Then, input the correct path which contain the pictures you wanna include in your gallery. Note the photos there will be removed away after Drupal copy them to sites/default/files/images. Press save config if ready.

Then, click "import" from the message box and you'll see a list of pictures you've just uploaded. Add title (title of the page, displayed on top of page and on browser top) and body (i.e. text below the picture)

Select the photo gallery (i.e. the album) to include all of these pages.


You can click on the links to see how the pages look.

* To create a gallery (i.e. an album), click: Admin/Content Management/Image galleries/Add galleries
** Root gallery can include its child galleries. Remember to mark the root gallery for the children. (Ref. site addr: http://localhost/drupal-6.12/image)
*** To set the thumbnail's size, click: admin/site config/images/files and sizes
CCK - Content type
After installed with CCK, I can create my own content type. For example, if I want to make a gallery. Inside the gallery, I'll have each discrete page such that a picture is followed by a short description. I could create a content type called "Picture" and include a image field.
In fact, I could install another module: "Image". This does the task I described. After installed such module, click Create content/image

Add new themes
We want to make our own themes with designated background, theme color and logos. To add a theme, what we need to do is to create a package for this theme. Copy the existing theme from drupal/modules to drupal/sites/all/themes/
The folder containing the theme should match the name for the .info file inside the package. Modify the first line of the info file for NAME field to whatever human-readable name you call it.
After that, you'll see the new theme in Home/Administer/Site building/Themes/.

The folder containing the theme should match the name for the .info file inside the package. Modify the first line of the info file for NAME field to whatever human-readable name you call it.
After that, you'll see the new theme in Home/Administer/Site building/Themes/.

Wednesday, June 3, 2009
Make an index page
For every website, there's an index page. Many ways to do this in Drupal. What I use is like this:

1. Go to Create Content/Page
2. Input the title, body for this page.
3. Under publishing options, select Promoted to front page
4. Click Save
When you press Home again, you'll be directed to the page you just made

Install Modules
Many Drupal Modules are available in Drupal. They can be downloaded from: http://drupalmodules.com/ After downloading Drupal modules, decompress them and place them into sites/all/modules. The Drupal modules can be seen from Home/Administer/Site building/modules page of Drupal.


** Similarly, to install a theme, place the theme into sites/all/themes


** Similarly, to install a theme, place the theme into sites/all/themes
Tuesday, June 2, 2009
Unable to locate the Database with Drupal
When I tried to locate the database location with Drupal, it keeps on asking me to input this information. I tried so many times and still with the same troublesome message.
Here gives me the solution:
http://drupal.org/node/312315
This happens if I lazily rename the default.settings.php into settings.php. In fact, I should have copied this file and rename it to settings.php. Never directly renaming the file or else the database message keeps on showing.
Here gives me the solution:
http://drupal.org/node/312315
This happens if I lazily rename the default.settings.php into settings.php. In fact, I should have copied this file and rename it to settings.php. Never directly renaming the file or else the database message keeps on showing.
Monday, June 1, 2009
Install Drupal 6.12 with WAMP2.0h on Windows XP
Today I just started installing Drupal using WAMP2.0h. Installing WAMP2.0 is not a problem. It's as easy as clicking a button. Based on the default WAMP setting, we needa enable Curl and GD on PHP, and mod-rewrite in Apache server. Enable by left-clicking the WAMP icon near the clock, select PHP/Apache and then select the corresponding features.

Next, open a database for Drupal and the corresponding login account.
Open a browser for http://localhost and find Drupal. Installation process is then started. Simply type in the database and login information for your Drupal site and that's all.

Finished Drupal Site. mod-rewrite is needed for Clean URLs which helps in eliminating "?q" in URLs.
Subscribe to:
Posts (Atom)